
 |
|
 |
|
 |
|
 |
|
 |
|
 |
|
 |
|
 |
|
|
 |
|
| : Standard : Optional | Start | Basic | Essentials | Motion | Desktop | |
| Image Acquisition | Basic image acquisition including HDR and auto-calibration of magnification and Live HDR*1, and position navigation*1 | |||||
| Software autofocus*2 and movie acquisition (Avi format) | ||||||
| Time lapse, Instant EFI, and Instant/Manual MIA*3 | ||||||
| Motorized EFI/MIA and Z-stack acquisition | ||||||
| Remote live view (NetCam) | ||||||
| Image and Customization Tools | Basic tool windows (Image history, properties, navigator, gallery view tool window)*4 | |||||
| Annotations, layer management, scale bar, cross hair, info stamp display, and image filters | ||||||
| Digital reticle/grid, line profile display, My Function, layout management, and Macro Manager | ||||||
| Measurements/ Image Analysis | Basic interactive measurement (distance, angles, rectangles, circles, ellipses, polygons, circle-to-circle distance, angle ruler, and line ruler) and data export to MS-Excel | |||||
| Phase analysis, magic wand, freehand polyline, interpolated polygon, morphology filter, and image arithmetics | ||||||
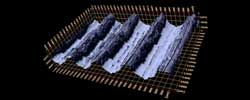
| 3D measurements, 3D profile measurements, and 3D surface view | ||||||
| Reporting*5 | Report creation (MS-Word, and MS-Excel formats) | |||||
| Presentation creation | ||||||
| Data Management | Stream document storage*6 | |||||
| Workgroup Database with structured data format | ||||||
| Device Support | Olympus microscopes*7 and Olympus cameras*8 | |||||
| Non-Olympus cameras and image source converter*9 | ||||||
| Non-Olympus stage controller*9 | ||||||
| PC Requirements | |
|---|---|
| CPU | Intel Core 2 Duo or higher (Intel Core i5, i7 recommended) |
| RAM / Hard disk / DVD drive | 3 GB or more (8 GB recommended)/2.4 GB or more free space/DVD+R DL compatible |
| OS*10 | Windows 10 Pro (32-bit/64-bit) , Windows 8.1 (32-bit/64-bit) Pro, Windows 7 (32-bit/64-bit) Ultimate with SP1, Windows 7 (32-bit/64-bit) Professional with SP1 |
| .NET Framework | Version 4.5.2 or 4.6.1 |
| Graphic card*11 | 1280 × 1024 monitor resolution with 32-bit video card |
| Web browser | Windows Internet Explorer 8, 9, 10, or 11 |
*1 Requires the DP74 camera, and the Live HDR function requires 64-bit OS.
*2 Requires Olympus microscope with motorized Z-axis or external motorized Z-axis with OLYMPUS Stream Motion or Automation Solution
*3 Instant MIA may not work properly with some cameras
*4 Write and read all major file formats and open Olympus proprietary formats (DSX, LEXT and POIR file formats)
*5 Requires Microsoft Office 2016, 2013 (SP1) or 2010 (SP2)
*6 Using Microsoft SQL Server Express
*7 Supports MX61A, MX61, MX61L, MX61A, MX63L, MX63, GX53, BX3M-CB, BX3M-CBFM, BX-UCB, BX-REMCB, IX-UCB, SZX-MDCU, SZX2-MDCU, U-CBS, STM7.
*8 Supports DP21, DP22, DP26, DP27, DP73, DP74, LC20, LC30, SC30, SC50, SC100, SC180, UC30, UC50, UC90, XC10, XC30, XC50, XM10.
*9 Please contact Olympus for supported device information
*10 The DP74 supports Windows 10/8.1 (64-bit) and Windows 7 (32-bit/64-bit). The DP73 supports Windows 8.1/7 (64-bit). The SC180/UC90 support Windows 10/8.1/7 (64-bit).
*11 Required configurations for LiveHDR in DP74. Graphic board applicable to CUDA made by NVIDIA (compute capability 2.1 or higher). Graphic board driver applicable to CUDA 7.0 or higher.
| Solutions | Compatiblity | Functions | ||
| Basic/ Essentials | Motion | Desktop | Measurement Type | |
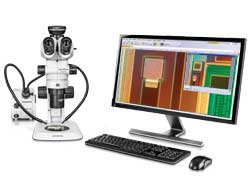
| 3D | Included | Partially included* | 3D Surface View, 3D Measurement, 3D Profile Measurement, Motorized Z-stack/EFI, Instant EFI with height map (requires coded or motorized Z-axis). | |
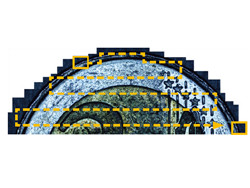
| Automation | Included | Automation Solution (Motorized/Manual/Instant MIA, Motorized/Instant EFI without height map (requires coded or motorized XYZ-axis) and with time lapse. | ||
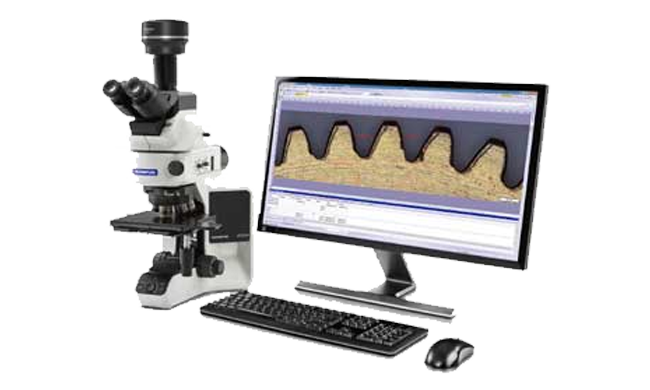
| Weld Measurement | Weld Measurement solution (measurements for geometric distortion introduced by the heating during welding). | |||
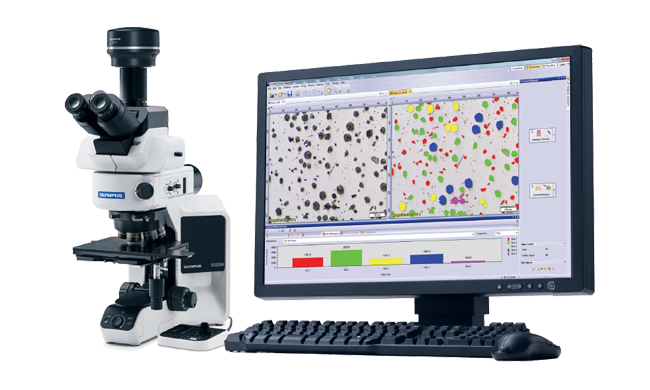
| Count & Measure | Multiple threshold methods are available (automatic, manual HSV, manual and adaptative) The system can automatically measure multiple parameters on all segmented objects (Area, Aspect Ratio, Bisector, Bounding Box, Gravity Center, ID, Mass Center, Intensity Values, Convexity, Diameters, Elongation, Feret, Extent, Next Neighbor Distance, Orientation, Perimeter, Radius, Shape, Sphericity, etc.) Spreadsheet and charts with individual and distribution measurements. |
|||
* Not possible to use the functions relating to image acquisition
| Solutions | Compatiblity | Output | |||||
| Basic | Essentials/ Motion | Desktop | Automatic report creation | Workbook with individual measurement | Store all results in the image properties | ||
| Grain Intercept | |||||||
| Grain Planimetric | *2 | ||||||
| Inclusion Worst Field | |||||||
| Cast Iron | |||||||
| Chart Comparison | |||||||
| Layer Thickness | |||||||
| Coating Thickness | |||||||
| Automatic Measurements | |||||||
| Throwing Power | |||||||
| Porosity | |||||||
| Particle Distribution | |||||||
| Advanced Phase Analysis | Included | Included | |||||
| Solutions | Functions | ||
| Measurement type | Supported standards | Multiple stage location*1 Sample alignment*1 |
|
| Grain Intercept | Selection of pattern (circles, cross, cross & circles, vertical lines, horizontal lines, horizontal & vertical lines) Definition of the number of test lines for determination of grain elongation Displays the G-value in the Material Solution tool window |
ISO 643: 2012, JIS G 0551: 2013, JIS G 0552: 1998, ASTM E112: 2013, DIN 50601: 1985, GOST 5639: 1982, GB/T 6394: 2002 | |
| Grain Planimetric | Automatic extraction of grain boundaries User interaction using Stream sliders for improved usability Displays the G-value histogram in the Material Solution and position navigation*1 for direct interaction |
ISO 643: 2012, JIS G 0551: 2013, JIS G 0552: 1998, ASTM E112: 2013, DIN 50601: 1985, GOST 5639: 1982, GB/T 6394: 2002 | |
| Inclusion Worst Field | Automatic detection of non-metallic inclusion using colors, shape, and size Automatic classification of oxides, sulfides, silicates, and aluminates Live display of the detected inclusion with its rating |
ISO 4967 (method A): 2013, JIS G 0555 (method A): 2003, ASTM E45 (method A): 2013, EN 10247 (methods P and M): 2007, DIN 50602 (method M): 1985, GB/T 10561 (method A): 2005, UNI 3244 (method M): 1980 |
|
| Cast Iron | On polished samples: automatically measures the characteristics of the graphite content (size, shape, and distribution) On etched samples: measures the ferrite to pearlite ratio Integrated workflow that takes into account the sample status (etched or polished) |
ISO 945-1: 2010, ISO 16112: 2017, JIS G 5502: 2001, JIS G 5505: 2013, ASTM A247: 17, ASTM E2567: 16a, NF A04-197: 2004, GB/T 9441: 2009, KS D 4302: 2006 |
|
| Chart Comparison | Multiple displays available, including live overlay User interaction using Stream sliders for improved usability Calculates statistics on the selected values |
ISO 643: 1983, ISO 643: 2012, ISO 945: 2008, ASTM E 112: 2004, EN 10247: 2007, DIN 50602: 1985, SEP 1572: 1971, SEP 1520: 1998, ISO 4505:1978 | |
| Layer Thickness | Layer boundaries can be specified using automatic detection, magic wand, or manual mode (using 2 or 3 points). Individual measurements can be added or deleted later on Measurement of any type of layers (with even or uneven boundaries) is supported. Layer thickness measurement calculates mean, maximum, and minimum values as well as statistical data for each individual layer. |
||
| Coating Thickness | Prints are measured from top view Calculation of the coating thickness according to the sample geometry |
EN 1071: 2002, VDI 3824: 2001 | |
| Automatic Measurements | Automatically measures distances (point-to-point, point-to-line, circle-to-circle, point-to-circle, line-to-circle) Automatically measures circle diameter (roundness, bounding box) Automatically measures angles between two lines Definition of tolerances values for measurement and visual validation Expert and user mode for measurement repeatability |
||
| Throwing Power | Manual measurements of selected point of interest on the sample Predefined points that will be triggered by the operator Selection of the vias type and documentation of the analysis Report and automatic calculation according to the manual measurements |
||
| Porosity | Pore detection per ROIs (triangle, circle, rectangle, polygon, or magic wand) with overlapping capability Measurement of the pore density, count, and specific area Measurement of the biggest pore Measurement of a specified size range |
||
| Particle Distribution | Particles are defined using simplified threshold settings. Automatic classification according to a selected parameter (size, color, or shape) Measurement of ROIs and multiple thresholds Definition of validation and coding according to user-defined standards |
||
| Advanced Phase Analysis | Phase fraction per ROIs (triangle, circle, rectangle, or polygon) Magic wand, freehand polyline, interpolated polygon, morphology filter, and image arithmetics also usable Measurement of the total phase percentage per phase and per ROI Selectable minimum area detection |
||
*1 Possible with OLYMPUS Stream Motion and other Stream packages with Automation solution
*2 Stream chart with the distribution can be output
If you have question you can reach us. Just fill up the form below.